Warning: count(): Parameter must be an array or an object that implements Countable in /home/helixart/public_html/blog/wp-content/plugins/wordpress-popup/inc/hustle-model.php on line 326
Warning: count(): Parameter must be an array or an object that implements Countable in /home/helixart/public_html/blog/wp-content/plugins/wordpress-popup/inc/hustle-model.php on line 326
Warning: count(): Parameter must be an array or an object that implements Countable in /home/helixart/public_html/blog/wp-content/plugins/wordpress-popup/inc/hustle-model.php on line 326

If you’ve ever read Like Water for Chocolate by Mexican novelist Laura Esquivel then you know how much cooking can be similar to magic. I guess that makes the kitchen a magician’s — rather, the chef’s — workshop, with their own “vials” of potions. Sure! I believe if the chef is happy in his or her domain, then as the book suggests, her happiness is felt in every bite, literally.

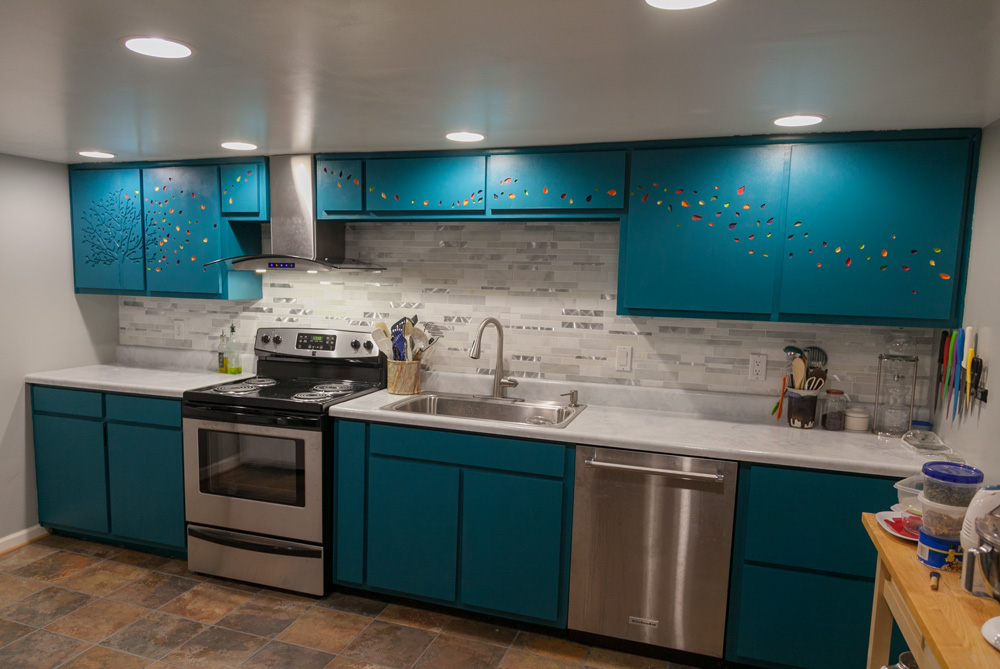
A couple of months ago, Sherry and Gregg — close family friends and mentors of mine — wanted to transform their second kitchen. It was last remodeled during the 1980s by Barney: the previous owner. When Sherry asked me if I wanted to do something funky and out-of-the-box to this small vintage room, I was eagerly on board. Even though I have much to learn in the realm of woodworking, I love a challenge. Most of all, I love creating unconventional art.
Before and After


I’ll share my experience with the remodeling, along with tips and tutorials. I’ll also include the tools and materials I’d recommend for a project like this. Now, this article isn’t meant to be a comprehensive how-to for each step, but some of these ideas might be useful throughout your own projects. Some of these may seem a bit technical; if that’s the case, please feel free to ask me questions.
If you’re starting any DIY or Pro projects, remember to always take proper safety measures. This was something I never compromised on. Tools like the table saw, miter saw, router, tile saw, jig saw, oscillating saw — which I used for this project — can be extremely dangerous if used haphazardly or improperly. A woodworker once told me:
Truer words were never spoken.
Planning & Research
This was the most important step of the project. During my initial meeting with Sherry, we talked about her ideas, wishlist, budget, timeline, etc. She also had a working Pinterest board and gave me access to it. It was extremely useful, not only for exchanging visual ideas, but also for giving me insight on the designs, color schemes, and components she liked. For example, it turned out that her favorite color is blue.
Choosing color is no joke, and your environment can play a huge role in limiting your choices. I thought: if I’m so meticulous about the emotional and symbolic impact of color with my graphic design, photography or film grading, why should I be any different with woodworking? As a matter of fact, wouldn’t it be even more important in real life?
Afterwards, Sherry and I began brainstorming on the out-of-the-box elements. She wanted the cabinet doors to be unlike any other and asked if I’d be able to route an intricate design on them. I immediately thought: “Hell yes!”
Sounds like something the Oracle from The Matrix would say, doesn’t it? Seriously, I mean that quote with humility, respect, and out of incessantly witnessing the perseverance of nature. She is always diligently and mysteriously turning something impossible into fruition, and it’s beyond inspiring. I know I’m personifying physics, but imitation is the sincerest form of flattery. Didn’t she galvanize and motivate architects like Antoni Gaudí or woodworkers like Nakashima Katsutoshi? It does give me courage to know that we’re all part of that system, and perhaps — like an inherited genetic trait — we can also have access to those tenacious qualities of mother nature. Truth is, her best-kept secret has always been “father time.” Nice couple, but I digress.
I’ll discuss the routing later in the article, but by the end of that meeting, we had some great ideas. I was ready to begin my research. In addition, I sketched out an outline of her kitchen so I know the approximate surface area and the overall placement of the cabinets.

I can’t emphasize enough the importance of research because everything you could possibly want to know is on the web. I love using Youtube to look up specific tasks, and for each topic, I usually view at least three different sources. Frankly, every DIYer or professional has their unique experiences and cautionary tales that I can benefit from. Furthermore, Gregg was one of those DIYers himself and was a pleasure to work with throughout the project. He has plenty of experience and knowledge on house repair, electrical work, flooring, plumbing, patchwork, and more; so I consulted with him many times.
Cabinet Remodeling
Take a look at this decision tree. I’ve also color-coded the choices we made for the kitchen.

When Sherry told me that she wanted to use paint for the makeover, the choices started to come together. We decided to:
- 1Sand the boxes instead of chemical stripping because they’re more than thirty years old and I wanted to give the wood a fresh start and the paint to adhere better
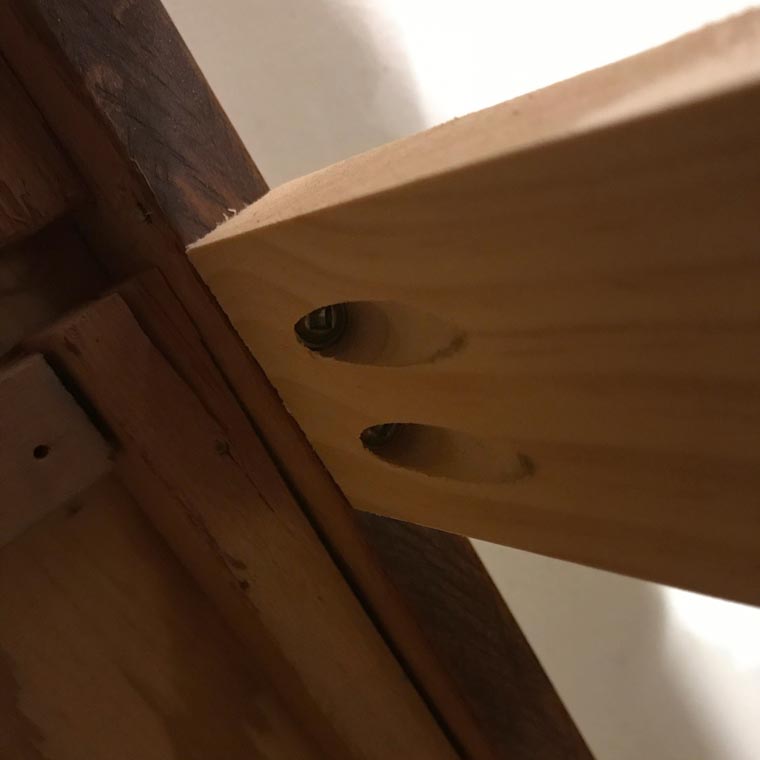
- 2Create some structural changes to the frame, reinforce weak joints, and do away with vintage design elements like scalloped accents
- 3Convert one of the cabinet boxes into two 10″ deep drawers to hold bigger kitchen items
- 4Create and cut brand new and slightly bigger doors, close the gap between them and do away with the handles or knobs entirely, instead create a hidden routed groove
- 5Have soft-closing European concealed hinges and switch the top doors to open horizontally
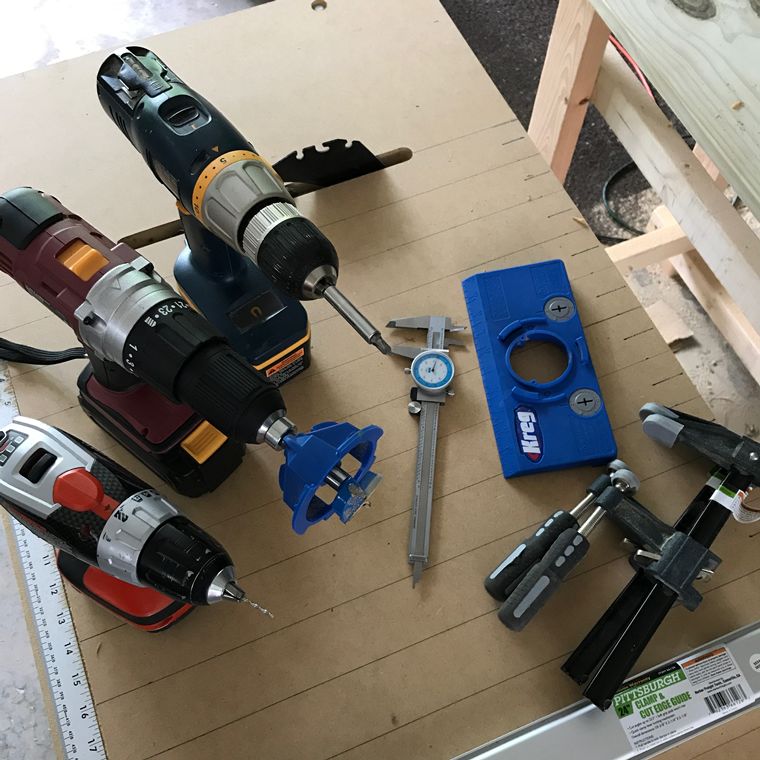
Some pictures I captured throughout those steps:


After cutting and routing the MDF doors, I was ready to paint. I must have watched at least ten different cabinet painting videos on YouTube. I also noticed one particular paint company kept coming up over and over. That happened to be Sherwin-Williams, particularly their ProClassic and Emerald collection of paints. Honestly, they weren’t kidding. I absolutely loved working with their products. Not only was the paint ridiculously smooth but also almost completely odorless. That was a huge benefit since this room had no windows.
Routing: The Tree of Life

When you put an epidemiologist, a microbiologist, and a musician in one room, you get some engaging conversations on life. What actually influenced the design was the fact that both Sherry and Gregg embrace nature and are extremely passionate about gardening. It’s almost as if horticulture were their second profession. During our planning, she mentioned that it would be nice to see trees or plants on the doors, mixed with autumn or fall colors. I believe that became the catalyst for the final choice.
These are some of the designs and wildcards I pitched to Sherry:


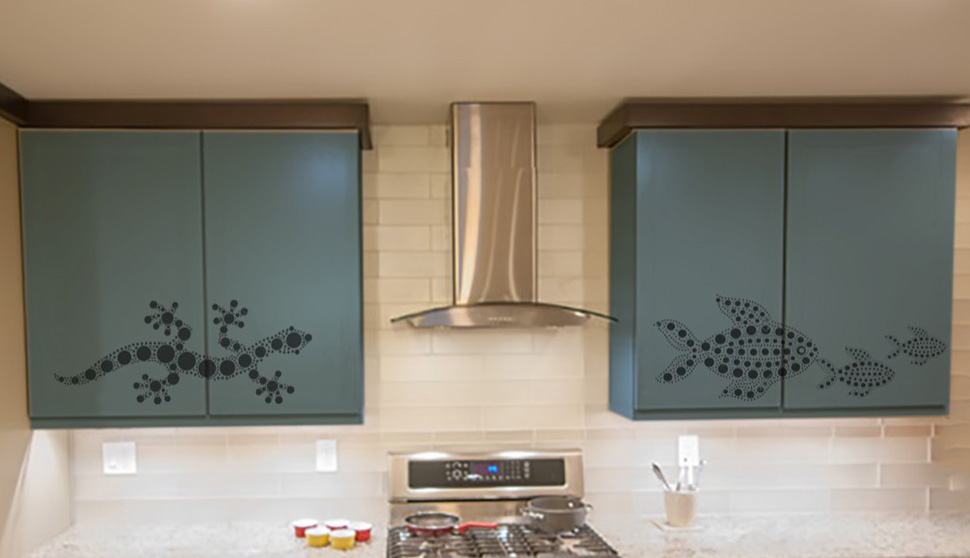

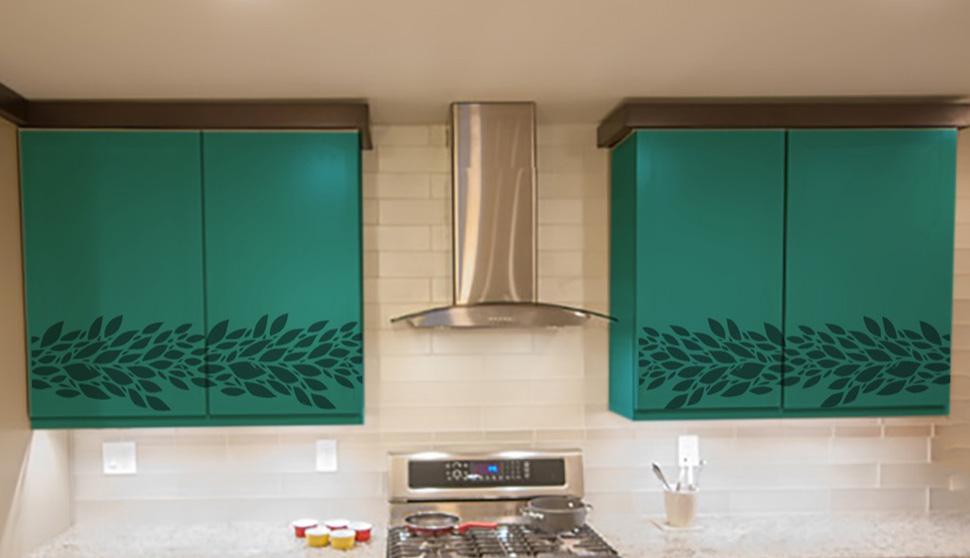

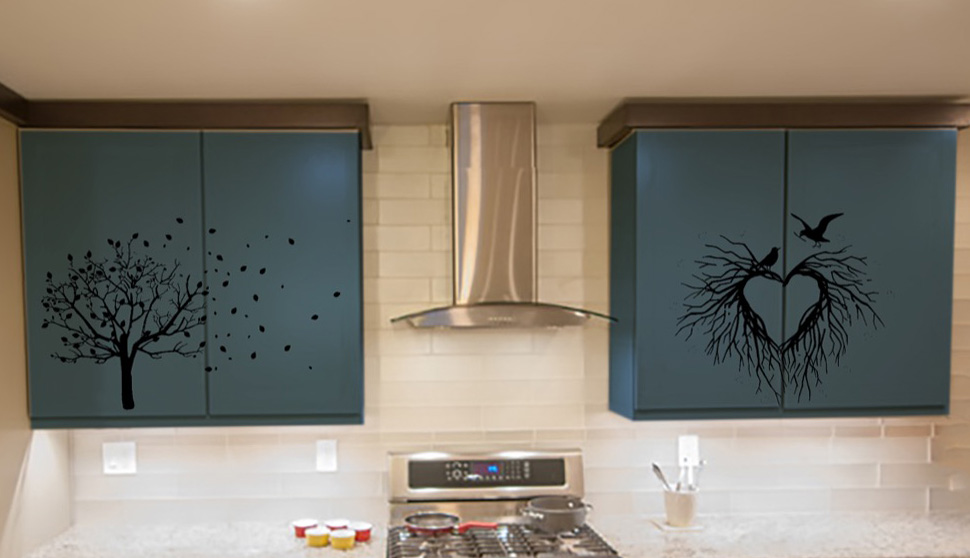
She chose the tree and loved the idea of the leaves flowing from one door to another. Good, because this permanently routed design had to be just right. Over the years, the more they look at it, the more it should grow on them. As a designer and a woodworker, it was important to me that the outcome be an extension of Sherry’s and Gregg’s personality as well as carry a deeper meaning. The latter is for my own artistic satisfaction.
In other words, I wanted the tree — including the leaves that are attached — to have a single color indistinguishable from each other, and it’s only when the leaves travel through the wind of time that they evolve, become more attractive, and parade their variegated colors. The world is more interesting because we’re different, don’t you think? We coined the design “The Tree of Life.”

The router by far is my most favorite woodworking tool in my shop, because it’s unbelievably versatile and demands your utmost attention. One option could have been to use a CNC router and have a machine route the whole design, but where’s the fun in that! More importantly, it adds to the value of the piece when it’s hand-routed, i.e. more humanized. It’s somewhat paradoxical, but for me, this meticulous task was the most relaxing part of the entire project. Check out this timelapse video of me routing the leaves.
When it was time to paint the leaves, I studied pictures with the autumn gradients. I also consulted with my girlfriend, Poonam, who’s a far talented artist than I am. She ultimately helped me put the finishing touches.

Countertop Resurfacing
With the direction of the cabinet colors and the routing, we thought the countertop seemed to be out place. On top of that, Sherry had told me that she was tired of it, which meant two things: either replace it entirely with natural stone (or even concrete) or resurface to something with a clean and modern look. The decision came down to the weight of a granite or a cement and whether the current frame would be able to support it. Since we didn’t want to replace the original boxes, we decided the best approach is to resurface.
After researching multiple possibilities — from metallic epoxy (check out Leggari) to decorative chips (Rustoleum) — and watching hours of countertop transformations on youtube, I recommended we go with a product called White Diamond by Giani. Not only would the white stone transformation look better between two blue sets of cabinets, but it would also make the room brighter and bigger. Among the tutorials Giani had online, one caught my interest: a video that showcased an advanced experimental technique to create a marble look. Now, Giani does not recommend this technique for countertops, but I was determined nonetheless. To take things a step further, I started studying different vein patterns of marble — specifically the Calacatta Michelangelo.
Calacatta is a rare marble that only comes from quarries located in Carrara, near Tuscany, Italy. It is said that Michelangelo first introduced the use of Calacatta. This can be confusing because the city of Cararra is also the home of the Carrara marbles, which Michelangelo also used to create the Biblical hero, David. The Pantheon was also constructed using the Carrara. To add to the confusion, many people mistakenly think that Calacatta marble originates from the city of Kolkata (formerly Calcutta), and maybe it was used to build the Taj Mahal. Actually, Emperor Shah Jahan used Makrana marble from Rajasthan, India to construct this intricate mausoleum.
Take a look at the initial veins that I drew and the results after blending:


Backsplash
With the presence of the Tree of Life and the painted cabinets, we needed a backsplash that was elegant and something that didn’t draw too much attention. I brought a few samples of mosaic sheets for Sherry and Gregg to compare, and what won over was the Natural Marble Mesh-Mounted Mosaic Tile from Home Depot. Around the same time, I was looking into properties of Calacatta marble for the countertop, so I believe I was naturally gravitating towards the stone.
For installation, I used a ready-made tile adhesive — OmniGrip — rather than mortar. I would recommend it for use with smaller tiles and in areas like backsplashes, as it’s quite easy to manage and saves time. When grouting, I stayed away from anything dark as it would have interrupted the brighter look of the white stones. Moreover, there were brushed aluminum pieces within the mosaic that added spots of darker metallic color. It blended well with the stainless steel appliances Sherry was getting ready to purchase.

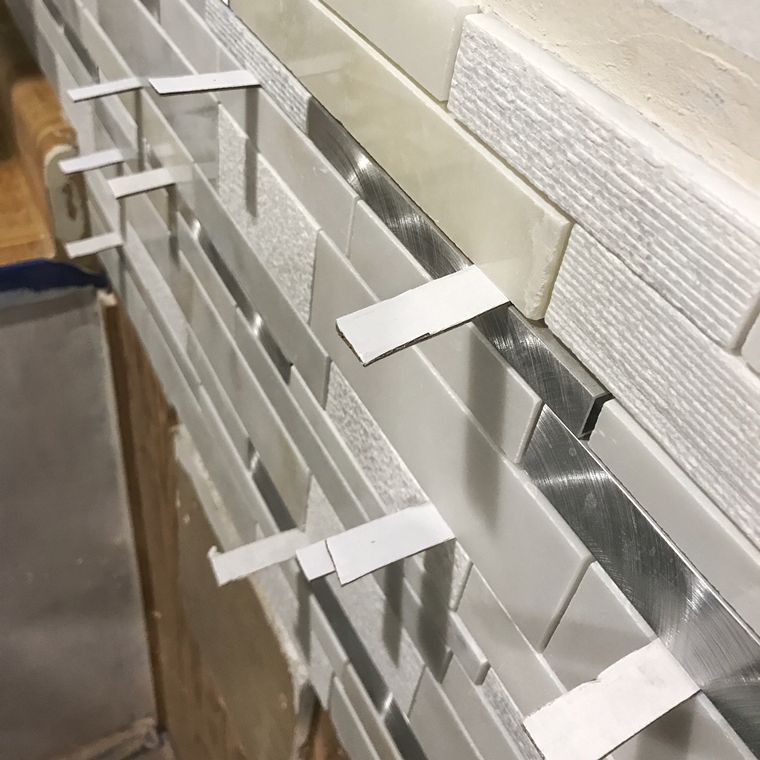

The spacing was pretty narrow between the tiles, so I went with the Polyblend White non-sanded grout. Furthermore, I didn’t want to risk scratching the natural stone with any type of sanded-grout.
Range Hood
Don’t underestimate the importance of a range hood (or an exhaust hood) and how it helps maintain your kitchen over time. One of my house related pet-peeves is a recirculating hood that blows back into the kitchen, even if it uses additional filtration (e.g. activated-charcoal filter). My advice, if possible during remodeling, is to create an external duct system that not only traps grease but delivers all the fumes, odor, smoke and airborne particles outside the house. Talk to your contractor.
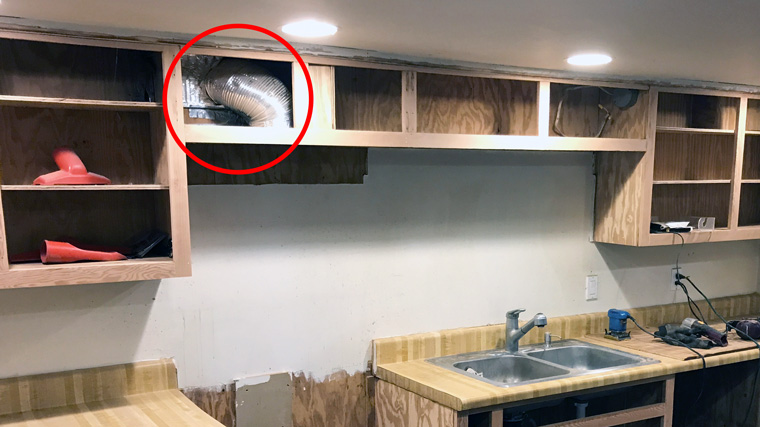
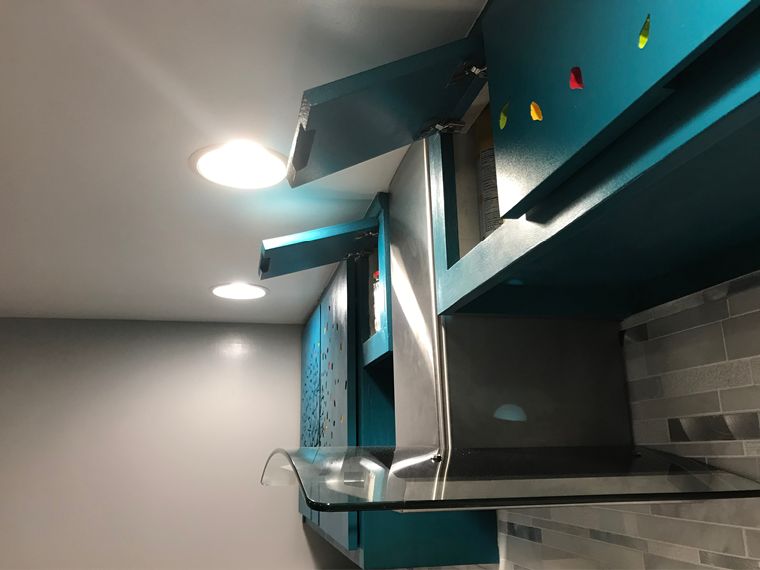
Thankfully Sherry’s kitchen already had an opening through the wall that ran outside the house, which is great because she sometimes makes jams and other items that creates a lot of humidity. After our research, we decided to go with the HA75-LED Stainless Steel Wall-Mounted hood. This curved glass hood, with touchscreen LED lights and a powerful 3-speed fan, was perfect for a modern touch in the kitchen. In order to install it, though, I had to remove a portion of the top cabinets, but it was worth the extra effort for the look.

Painting Walls and Ceiling
There were a lot of bundt pans and cookie cutters hanging on the walls, and over the years they cried. Yes, you read that right. This happened over time when Sherry canned jams using a technique called water bath canning. Without adequate ventilation from a hood, that process left a lot of residual water vapor in the room, which collected everywhere including on the bundt pans and cutters. After a while, they would form water beads and slowly drip downwards — taking the copper color off the pan onto the wall — like teardrops. if you didn’t know any better, it might look quite eerie. Of course, I didn’t know any better until Gregg told me what was happening!
Believe me when I say this: 90% of painting is the actual preparation. Sometimes it can be cumbersome but it can prevent tons of extra work. Since there were nails in the wall, I had to patch up the holes. A generic sheetrock mud and a putty knife got the job done. Then I decided to lightly sand the walls so the paint would adhere better. After priming, I applied two coats of the Sherwin-Williams semi-gloss paint and was very happy with the results.
Overall, those few weeks of working on this project have left me with a lot of great experience, not to mention a level of artistic fulfillment. I’ll always encourage you to try something new and creative around the house. Maybe start with a small weekend project — because even that can give you a lasting feeling of accomplishment and confidence to take on something bigger. Trust me, if I can do it then so can you.
DISCUSSION